


Tilt Shift Lens
The tilt-shift lens with its dual functionality is suitable for realistic architectural photography, sharp landscape images and miniature photography.
72
Search results
Sort by:
Popularity
Popularity
Price low - high
Price high - low
["12519792","12465452","12540617","12492422","12569015","12436769","12436782","12518479","12414353","12532763","12540615","12492423","12559596","12518474","12519789","12436783","12518475","12518477"]
 5 years warranty
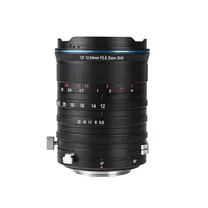
Laowa 12-24mm APS-C f/5.6 Zoom Shift CF Fuji X
In stock
List price €859.00
€ 721. 65
 5 years warranty
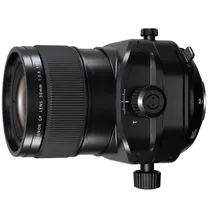
Fujifilm GF 30 mm F/5.6 T/S (tilt-shift)
In stock
List price €4,499.00
€ 4,099. 00
 5 years warranty
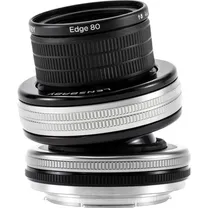
Lensbaby Composer Pro II with Edge 80 Canon EF
On order
List price €469.99
€ 349. 00

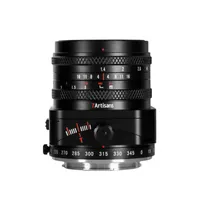
7artisans 50mm F/1.4 Fuji-FX mount
In stock
List price €239.00
€ 189. 00
 5 years warranty
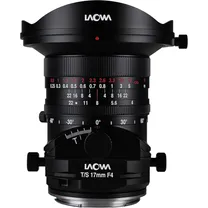
Laowa 17mm F/4 Zero-D Tilt-Shift Canon RF
In stock
€ 1,449. 00

AstrHori 50mm f/1.4 Tilt Nikon Z (Full Frame)
In stock
€ 259. 00

AstrHori 85mm f/2.8 Macro Tilt L-Mount (Full Frame)
In stock
€ 329. 00
 5 years warranty
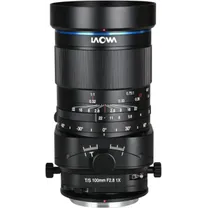
Laowa 100mm F/2.8 Tilt-Shift 1X Macro Fuji GFX
In stock
List price €1,559.00
€ 1,322. 10
 5 years warranty
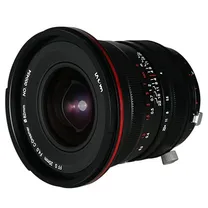
Laowa 20mm f/4.0 Zero-D Shift Lens - Fuji GFX
In stock
€ 1,359. 00

TTartisan APS-C Tilt 35mm F/1.4 M43 mount Black
In stock
List price €219.00
€ 155. 00
 5 years warranty
Lensbaby Composer Pro II with Soft Focus II Optic for Sony E
In stock
List price €379.99
€ 349. 00
7artisans 50mm F/1.4 M43 Panasonic / Olympus
In stock
List price €239.00
€ 189. 00
 5 years warranty
Laowa 35mm F/2.8 Zero-D Tilt-Shift 0.5x Macro L-mount
In stock
€ 1,449. 00
 5 years warranty
Laowa 55mm F/2.8 Tilt-Shift 1X Macro Fuji GFX
In stock
List price €1,559.00
€ 1,402. 20
 5 years warranty
Laowa 12-24mm APS-C f/5.6 Zoom Shift CF Sony E
In stock
List price €859.00
€ 799. 00

AstrHori 85mm f/2.8 Macro Tilt Nikon Z (Full Frame)
In stock
€ 329. 00
 5 years warranty
Laowa 100mm F/2.8 Tilt-Shift 1X Macro Sony FE
In stock
List price €1,559.00
€ 1,330. 20
 5 years warranty
Laowa 100mm F/2.8 Tilt-Shift 1X Macro Nikon Z
In stock
List price €1,559.00
€ 1,322. 10
Popularity
Price low - high
Price high - low
What is a tilt-shift lens?
The tilt-shift lens is a lens with two possible uses for photography, namely tilt (tilt) and shift (shift). Since the 1960s, developments in both possibilities have strongly increased, resulting in a wide range of cameras with these functions. In the beginning, the tilt and shift function were still separate, but due to the effective cooperation, they are almost always combined on a single lens nowadays . In the absence of an autofocus function, the tilt-shift lens has to be used to focus manually.
The tilt and shift function
The lens elements of a tilt-shift lens can be adjusted by the attached dials. There are two options for making these changes. The first function is the tilt, with which the lens can be tilted down or up to a maximum angle of 8.5 degrees. This allows the depth of field to be adjusted, suitable for landscape, miniature and product photography. The second function is the shift, with which the lens can be moved down or up to a maximum distance of 12mm. With this function, the perspective of a photo can be corrected, making it suitable for architectural and interior photography. The last option is to tilt the lens 90 degrees, which offers the possibility to use the tilt and shift function from left to right. This is especially useful for creating sharp panoramic images.
Increase depth of field
With the tilt function, the depth of field of an image can be spread over a larger area, so that objects in the foreground and background can be brought into sharper focus. With a normal lens, the aperture must first be reduced before the entire design can be captured with the same sharpness, but then the sharpness of the whole is compromised considerably. By tilting the lens with the tilt function you can move the depth of field line to the subject, so that objects in the foreground and background are sharp across the entire surface. This can be a great advantage in both product and portrait photography, as important objects can be precisely highlighted away from those of less importance.
Creating a miniature
In addition to being effective for product or portrait photography, the tilt function can also provide an effect that makes cities and landscapes appear as a miniature. The advantage of this option is that this effect does not have to be made in post-processing of a photo, but can be done directly using the tilt function. Tilting the image down or up will move the focus of the depth of field and make the objects in the photo appear to be tiny in size. This is because the environment around the highlighted objects is very out of focus and this makes the subject appear much smaller than it actually is.
Correcting perspective
A common problem when photographing architecture in urban areas is that if you hold the camera up at an angle, buildings appear to lean forwards or backwards. Although this is not the reality, it gives the viewer the feeling that they are looking at an unrealistic photo. By placing the camera on a tripod with spirit level, this can be prevented using the shift function. With this function you can move the lens down or up, which corrects the perspective. As a result, the vertical lines run straight and a photo of a building or entire skyline looks more realistic.
Develop panoramic photos
The problem with taking panoramic photos with a normal lens is that when you merge several photos together, the transitions are never completely seamless. In addition to the presence of a panorama function on the camera, it is also possible to make a horizontal or vertical panorama using the shift function. You do this by setting the shift function to the left or right and taking a photo of this part, then pressing the shift function the other way and taking another photo. These two photos can be combined into one photo with a stitching program.
Using the lens
In order to get the maximum result from the different functions of the tilt-shift lens, it is very important to learn how to use this lens. Since the lens has to be operated manually, we will highlight a number of important things. To stabilise the image, it is advisable to always work from a tripod and to set the camera completely straight with a spirit level. This allows you to fully focus on manual focus and subject determination. For best results, the live view should be switched on, which allows you to immediately see which image will be captured. After you have chosen the final design, focus and then take the photo.